CTF writeup: Snapped Phish-ing Line (TryHackMe)
Link to challenge: Snapped Phish-ing line
The task
An Ordinary Midsummer Day… As an IT department personnel of SwiftSpend Financial, one of your responsibilities is to support your fellow employees with their technical concerns. While everything seemed ordinary and mundane, this gradually changed when several employees from various departments started reporting an unusual email they had received. Unfortunately, some had already submitted their credentials and could no longer log in.
You now proceeded to investigate what is going on by:
- Analysing the email samples provided by your colleagues.
- Analysing the phishing URL(s) by browsing it using Firefox.
- Retrieving the phishing kit used by the adversary.
- Using CTI-related tooling to gather more information about the adversary.
- Analysing the phishing kit to gather more information about the adversary.
With that out of the way, let’s launch the vm and dive right in!
Q1: Who is the individual who received an email attachment containing a PDF?
This first one doesn’t require a lot of research. Looking through the emails provided to us in the vm we can quite easily find the email that contains the .pdf attachment.
It’s a file called Quote.pdf which was sent to William ****.
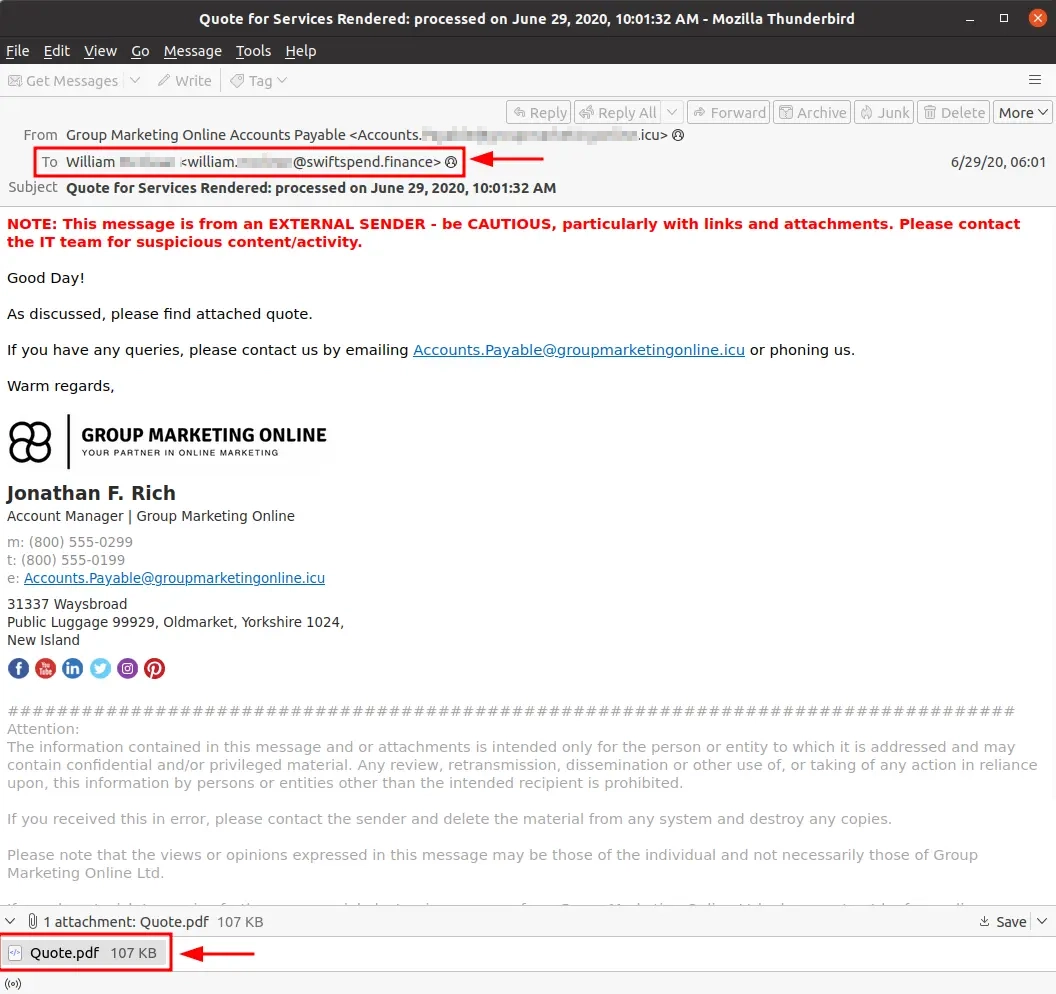
Q2: What email address was used by the adversary to send the phishing emails?
The email address from which these emails were sent from can be seen in the From header of the email (Accounts.****@****.icu).

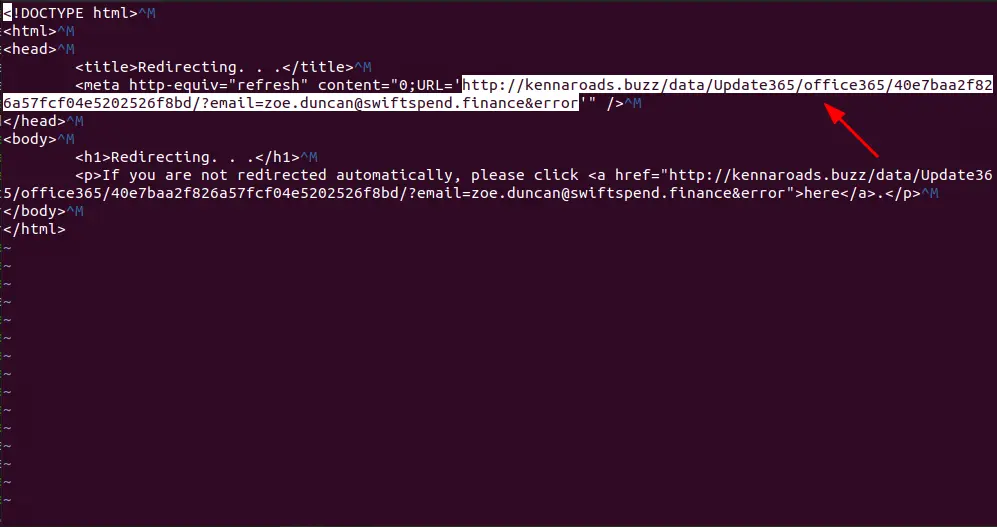
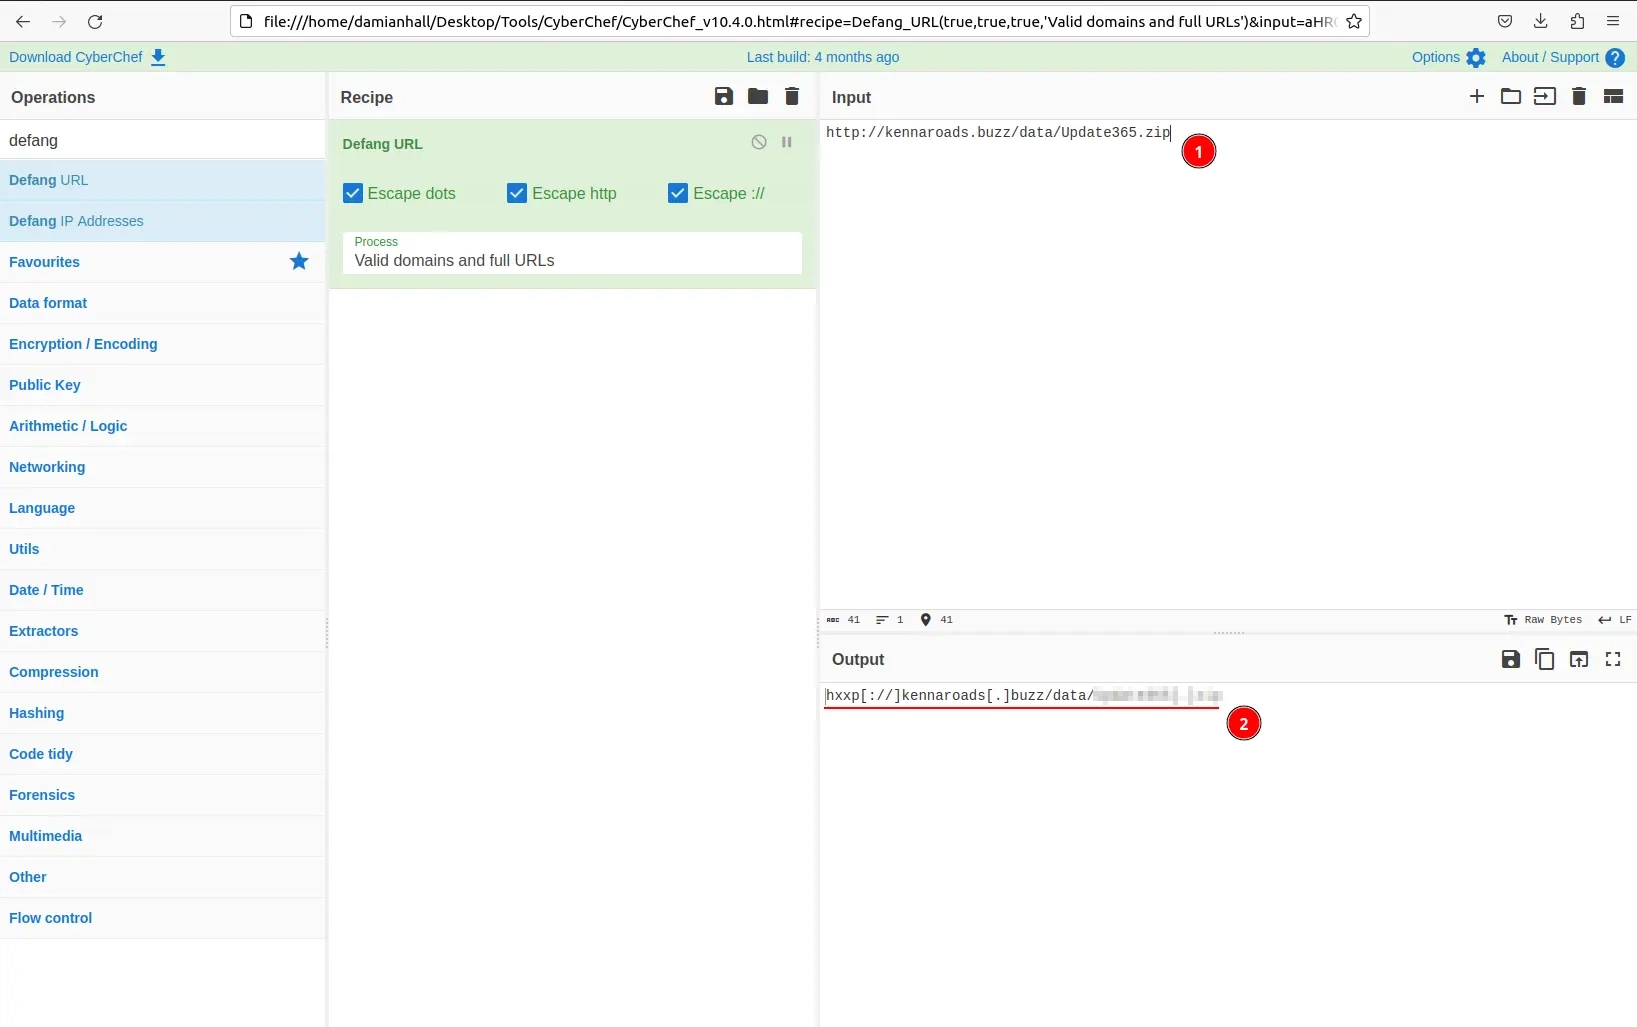
Q3: What is the redirection URL to the phishing page for the individual Zoe Duncan? (defanged format)
Saving one of the html attachments from one of the phishing emails and opening it in a text editor, we find the redirection URL. Let’s copy it and defang it.
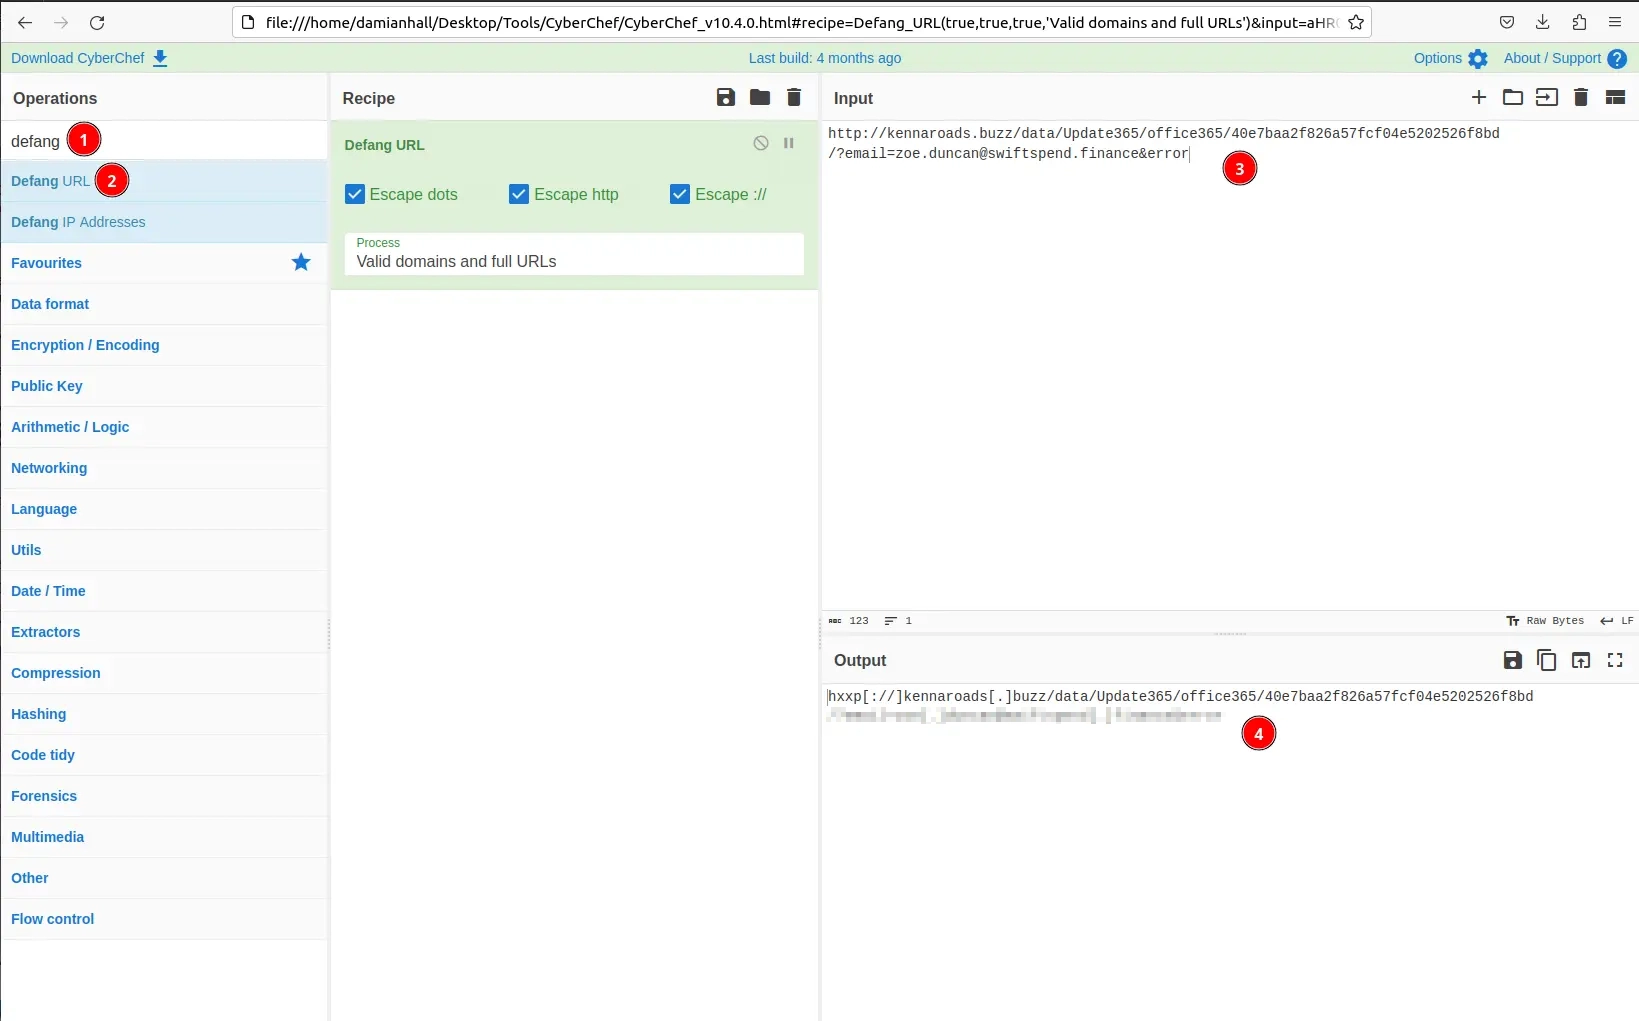
Open up Firefox within the VM and navigate to CyberShef (can be found in the bookmarks).
- Search for “defang”
- Select “Defang URL”
- Paste the URL in the Input box
- Copy the defanged URL from the Output box (hxxp[://]kennaroads[.]…)
Q4: What is the URL to the .zip archive of the phishing kit? (defanged format)
Looking at the URL we see that there is a directory called /data. Hmm… can we access that directory?🤔
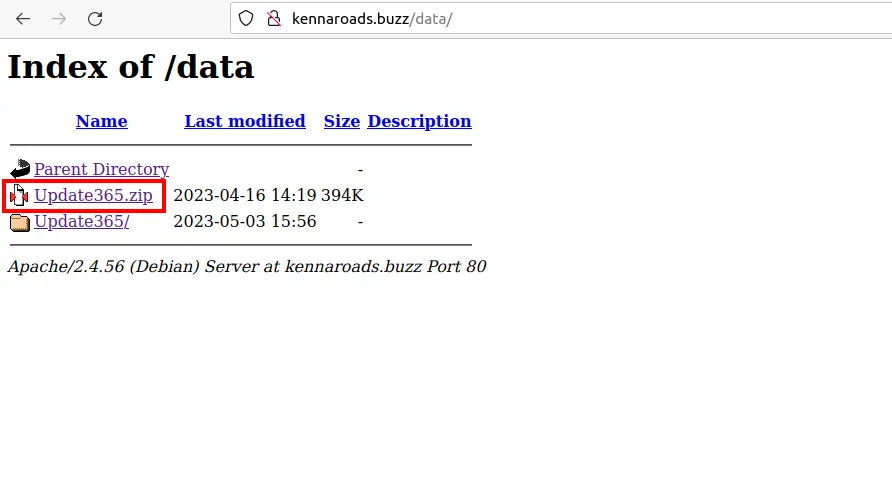
Yes, yes we can! We have access and there is the Update365.zip file. Let’s copy the URL and defang it just like we did with the URL before…
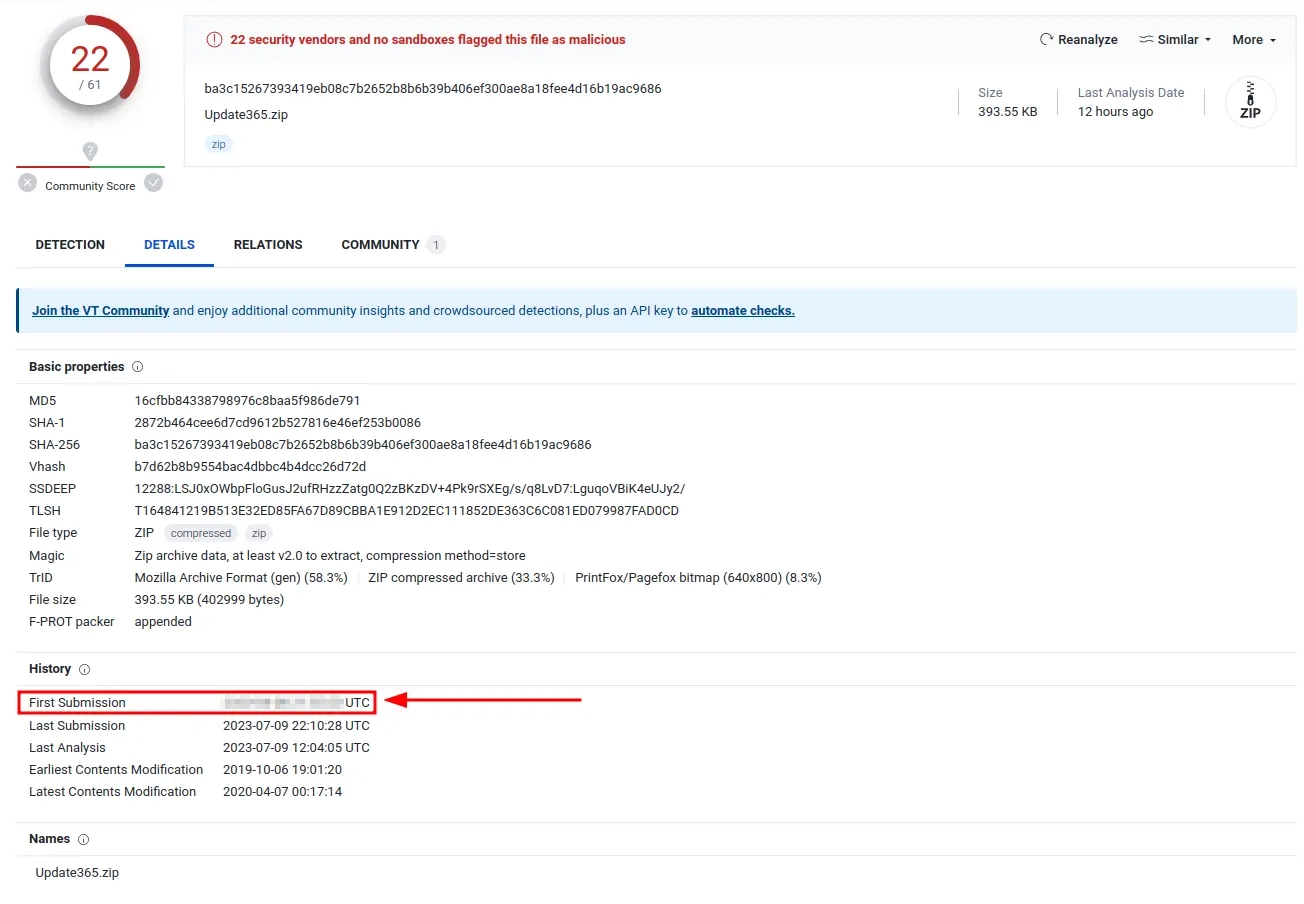
Q5: What is the SHA256 hash of the phishing kit archive?
We need to download the .zip to get the SHA256. Once downloaded,
we can run the command sha256sum Update365.zip to get the SHA256 hash of the archive.

Q6: When was the phishing kit archive first submitted? (format: YYYY-MM-DD HH:MM:SS UTC)
Copying the SHA256 hash and pasting it into Virustotal gives us more information about the archive. It’s detected as malicious by 22/61 vendors (that’s good!), but that’s not what we’re looking for. We want to find out when it was first submitted. For that we need to navigate to the Details tab and scroll down to History. Here we can see the First Submission date and time.
Q7: When was the phishing domain that was used to host the phishing kit archive first registered? (format: YYYY-MM-DD)
Now let’s navigate over to ThreatBook and search for the URL “kennaroads.buzz”. Under the Whois tab we can see the date and time when the domain was registered.

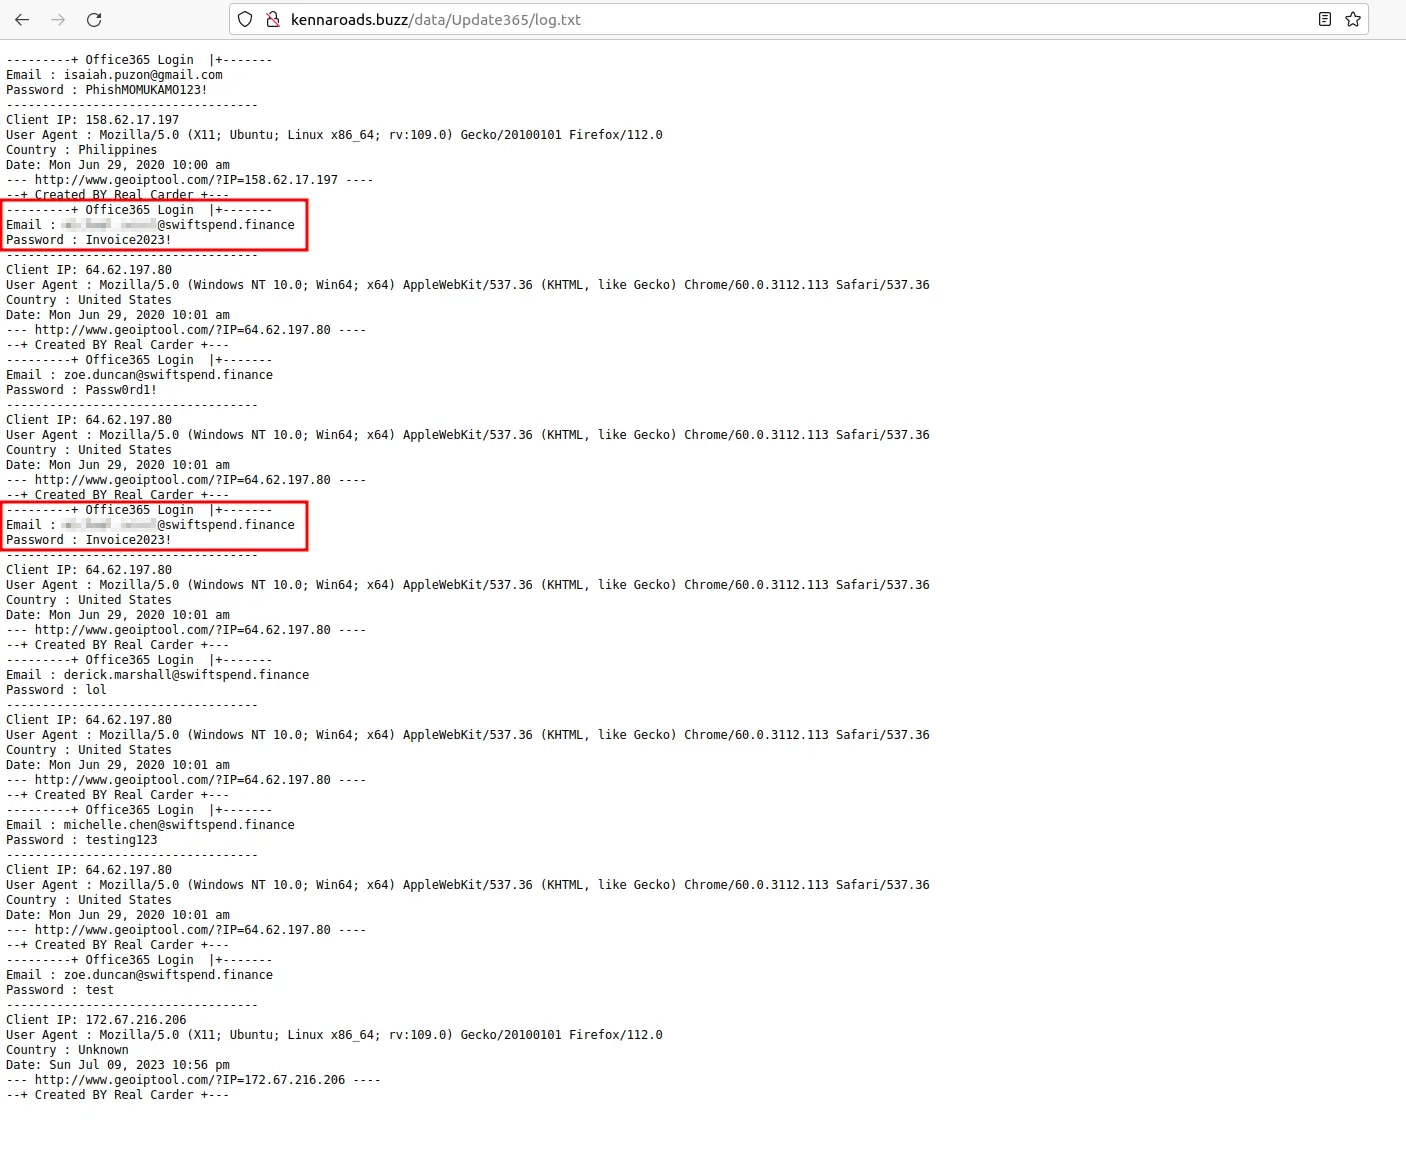
Q8: What was the email address of the user who submitted their password twice?
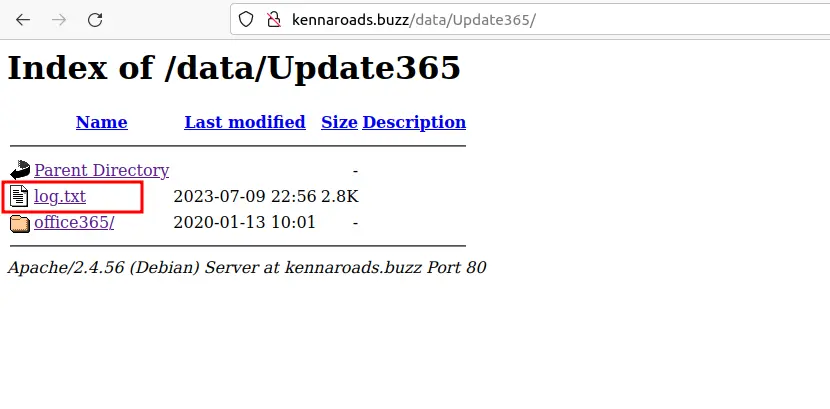
Going back over to the /data directory we discovered earlier,
we see that there is another directory called /Update365 within the /data directory.
If we open that up we find a delicious looking log file called log.txt.
Opening up the log.txt file gives us all the saved data from the form on the phishing website. Upon further inspection, we can see that one poor employee submitted their password twice.
Q9: What was the email address used by the adversary to collect compromised credentials?
Going back to our terminal, we can extract the .zip we downloaded earlier to have a closer look at the guts of the archive.
unzip Update365.zip
cd Update365
Now, there are many ways of finding the email addresses (manually browsing the files is one), but let’s do some ✨grep magic✨.
Running grep -srhw "[[:alnum:]]\+@[[:alnum:]]\+" | sort | uniq will recursivly look through the files and try to match anything that looks like an email address.
Piping the output to sort and then to uniq gives us more readable output.
As you can see below, this output gives us 3 results. 2 of which are useful and 1 red herring!

Q10: The adversary used other email addresses in the obtained phishing kit. What is the email address that ends in “@gmail.com”?
Answer found while looking for the email address in the previous task.
Q11: What is the hidden flag?
Now let’s find that flag!🚩
The hint says:
The flag contains a “.txt” extension and, with some adjustments, should be downloadable from the phishing URL. Look for the flag in every subdomain/directory of the phishing URL.
Opening up the browser again and navigating over to the /data directory,
the only direcoty we haven’t yet taken a look at is /data/Update356/office365.
However, trying to open the directory takes us down the path to some destination
which gives us a Not Found error:
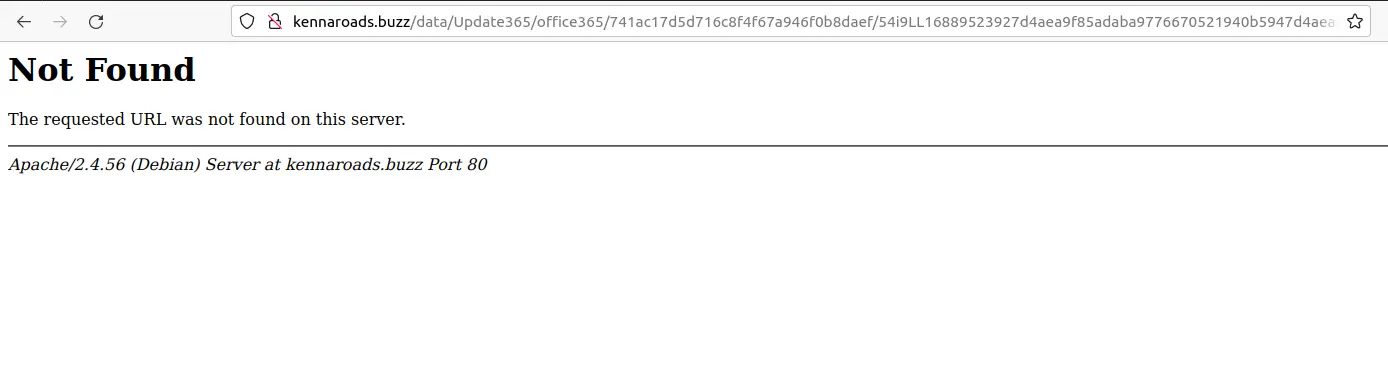
I wonder… can the flag be in the /data/Update356/office365 directory?
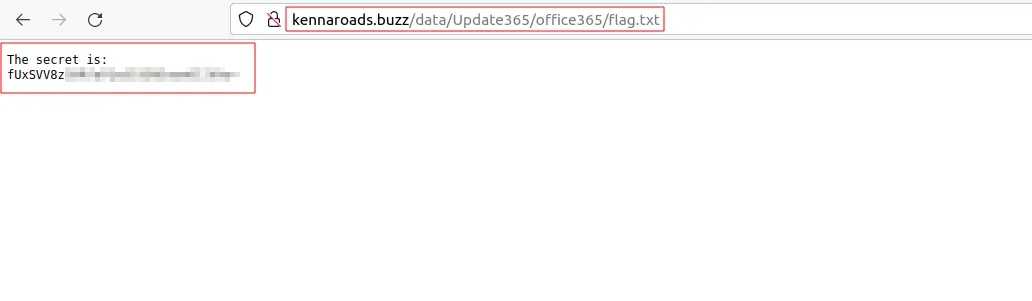
Trying to manually look inside the /office365 dir for a flag.txt file does sure enough
yield a successful outcome!
Let’s see what this string is by using CyberShef’s Magic operation. It’s Base64 and the string is reversed.
Using CyberShef’s From Base64 operation in combination with Reverse we should get the desired output.
NOTE: You cannot reverse the Base64 string before decoding it. The string has to be decoded and then reversed. Kind of obvious in this case but good to keep in mind.
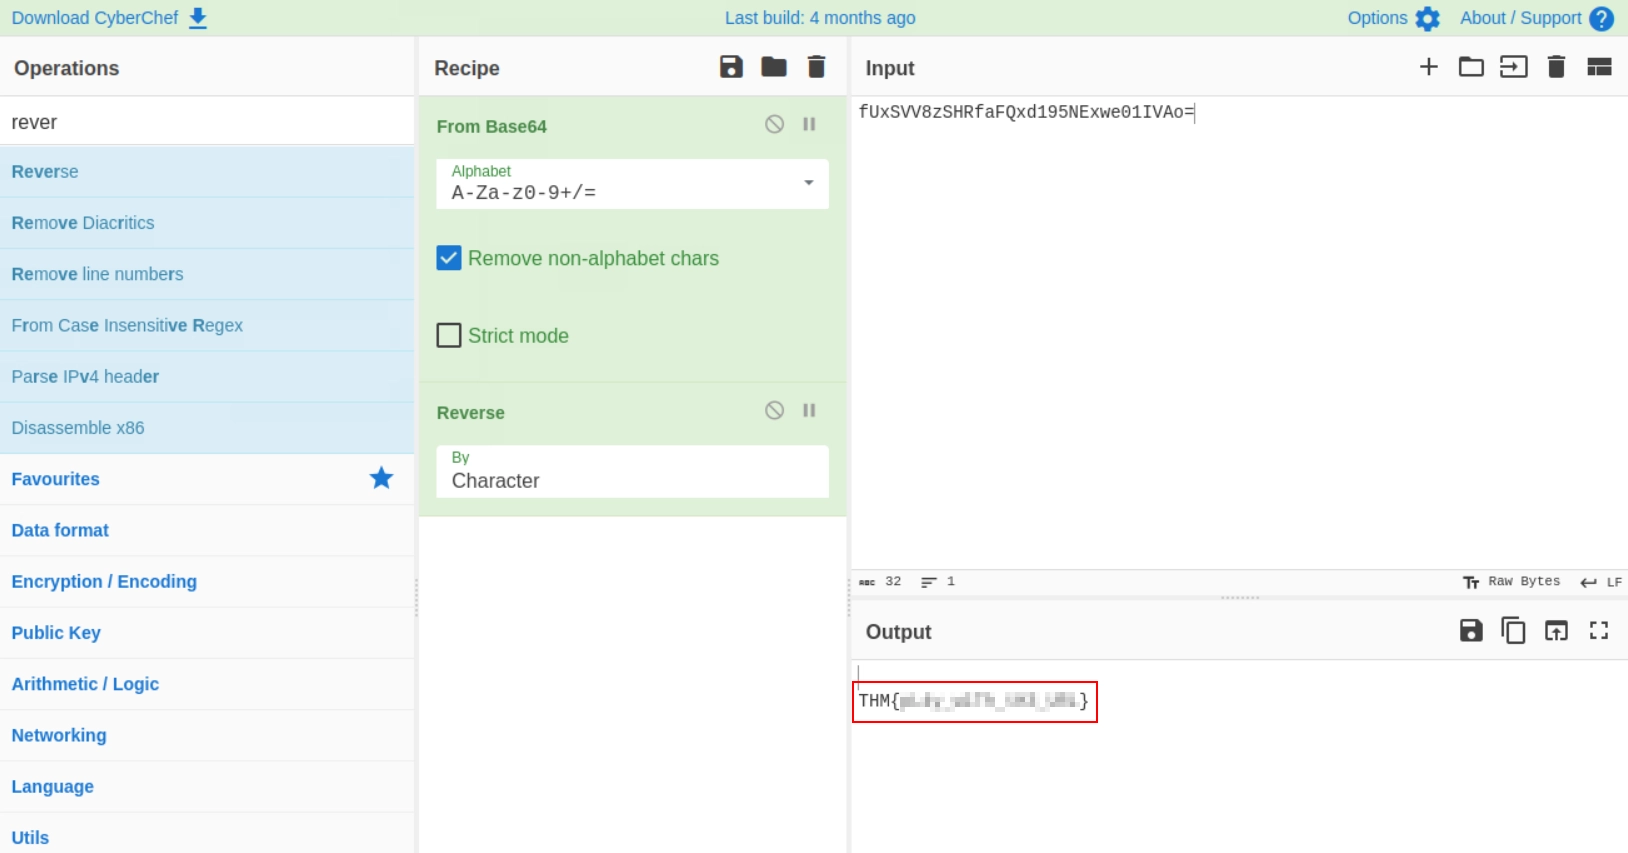
And there we have it!
Thank you for reading my writeup of this CTF challenge! Have a nice day! :)